Window frames have been a big hit lately in the decor world. I have been loving these cathedral window frames! I bought some a few years ago for my bedroom:
DIY Cathedral Window Frame. DIY farmhouse window frame. How to make a cathedral window frame tutorial. DIY farmhouse decor. DIY wall decor. Decorating with window frames. Farmhouse decor and decorating ideas.

I also bought one for my mantel recently.
DIY Cathedral Window Frame. DIY farmhouse window frame. How to make a cathedral window frame tutorial. DIY farmhouse decor. DIY wall decor. Decorating with window frames. Farmhouse decor and decorating ideas.

Then I realized how easy these would be to make...and how cheap! Seriously, you guys, this only cost me like $3 to make. I bought the whole board for around $5 and can cut two of them out of it....or just one really large one! I'm running out of wall space to put all my decor, but I really want one of these in every room in my house :) 

Here's how I made it;
Supplies:
2x4 plywood board
Craft paper/printer
Drill with large drill bit
Jigsaw with scroll blade
Sandpaper
Stain

Step 1: This is probably going to be the trickiest part of the whole thing. Find a design you like, either online or sketch one yourself. If you print one online, print it as large as you would want your frame to be. If you are doing this from home, this may mean you will be printing out multiple pages and taping them together. Or you can take it to a print place and they can print it the size you want for just a couple of dollars. Or, if you have a piece you already like, just trace that or change it up a bit to make it different :) I traced mine first on kraft paper.
DIY Cathedral Window Frame. DIY farmhouse window frame. DIY farmhouse decor. DIY wall decor. Decorating with window frames. Farmhouse decor and decorating ideas.
 Step 2: I cut out the negative spaces and then placed it on my board.
DIY Cathedral Window Frame. DIY farmhouse window frame. DIY farmhouse decor. DIY wall decor. Decorating with window frames. Farmhouse decor and decorating ideas.
 Step 3: I traced the entire piece with a pencil.
DIY Cathedral Window Frame. DIY farmhouse window frame. DIY farmhouse decor. DIY wall decor. Decorating with window frames. Farmhouse decor and decorating ideas.
 Step 4: Time to start cutting. First, I drilled a hole into the middle of each of the parts that are going to be cut out.
DIY Cathedral Window Frame. DIY farmhouse window frame. DIY farmhouse decor. DIY wall decor. Decorating with window frames. Farmhouse decor and decorating ideas.
 Step 5: I then used my jigsaw to cut out the wood. Here's an idea of how I did it. Mostly, just starting from the drilled circle and rounding it to the edges. Then I come back up the opposite way to finish the line.
DIY Cathedral Window Frame. DIY farmhouse window frame. DIY farmhouse decor. DIY wall decor. Decorating with window frames. Farmhouse decor and decorating ideas.

DIY Cathedral Window Frame. DIY farmhouse window frame. DIY farmhouse decor. DIY wall decor. Decorating with window frames. Farmhouse decor and decorating ideas.
 This is how it looked all cut out. 
DIY Cathedral Window Frame. DIY farmhouse window frame. DIY farmhouse decor. DIY wall decor. Decorating with window frames. Farmhouse decor and decorating ideas.
 Step 6: Sand the edges with a fine grit sandpaper. 
DIY Cathedral Window Frame. DIY farmhouse window frame. DIY farmhouse decor. DIY wall decor. Decorating with window frames. Farmhouse decor and decorating ideas.
 Step 7: Not shown...but, stain! I used a dark walnut stain on mine. Make sure to get all the edges also.

And it's as easy as that! I seriously made this is under an hour. I can't believe how quick and easy this was to make! And how inexpensive! I've seen some very similar to this going for $90+ online. I know! Crazy! Even if you find one for like $25, this is still a way better deal :) 
DIY Cathedral Window Frame. DIY farmhouse window frame. DIY farmhouse decor. DIY wall decor. Decorating with window frames. Farmhouse decor and decorating ideas.
 I decided to dress mine up with a wreath. I love layering things like this, just adds a ton more interest :)
DIY Cathedral Window Frame. DIY farmhouse window frame. DIY farmhouse decor. DIY wall decor. Decorating with window frames. Farmhouse decor and decorating ideas.
 I took my beloved clock down to put this up, not planning on keeping it here, and now I really want to! I guess I have to find a new home for my clock :) 
DIY Cathedral Window Frame. DIY farmhouse window frame. DIY farmhouse decor. DIY wall decor. Decorating with window frames. Farmhouse decor and decorating ideas.
Next one I make out of the left over board will be a little bit longer than this one. That's the best thing, that it's so easy to change up! And won't take forever to make another :)

Pin for later:
DIY Cathedral Window Frame. DIY farmhouse window frame. How to make a cathedral window frame tutorial. DIY farmhouse decor. DIY wall decor. Decorating with window frames. Farmhouse decor and decorating ideas.

Pin It
DIY sliding perpetual Calendar. DIY wood calendar. DIY farmhouse decor. DIY calendar

I am so excited for today's project!  I have been wanting to make one of these for forever, and I finally did! Plus, it turned out better than I ever imagined...bonus! So, what the heck is a perpetual calendar? It's a calendar that can be used year after year! There's no need to buy a new calendar....I guess unless you want the year on the calendar :) I fell in love with this sliding one and knew it would be so easy to make one. Here's how I did it!

Supplies: 
2  -1x2 pieces cut at 10.75"
3  -1/2x2 (measures 1/2" by 1.5") pieces cut at 20"
2  -1/2x2 pieces cut at 3/4"
4  -1/2x2 pieces cut at 2"
2  -1/2x2 pieces cut at 1.5"
1  -1x3 cut at 21"
They should all lay out like below:
DIY sliding perpetual Calendar. DIY wood calendar. DIY farmhouse decor. DIY calendar

 Additional supplies:
Wood glue
Stain
Metal 1/8" flat pieces (Found in the car/hobby section at Hobby Lobby)
Metal label holders (Mine are from Hobby Lobby)
Dremel with round metal cut disc
Super Glue
Spray Paint
Vinyl
Painter's tape
6 black 1/4" screws

Step 1: Use the picture from above and place all the wood pieces together like a puzzle. The 1x2 10.75" pieces are the bottom with the smaller pieces glued on top. Make sure all the edges are square so the entire piece keeps straight.
DIY sliding perpetual Calendar. DIY wood calendar. DIY farmhouse decor. DIY calendar
 Step 2 & 3: These steps I reversed just since I thought it would be easier to stain before placing the base, but it really doesn't matter. I stained my wood use DecoArt Americana Walnut stain.
DIY sliding perpetual Calendar. DIY wood calendar. DIY farmhouse decor. DIY calendar
 I then glued the piece to the 1x3 base. You can either just leave it with the glue, or secure it from the underside with nails or screws. I used a nail gun and 1" brad nails into the base of mine.
DIY sliding perpetual Calendar. DIY wood calendar. DIY farmhouse decor. DIY calendar
 Then of course, make sure you stain the base if you haven't already.

Step 4: Making the sliders. This is probably the most complex part of it. Maybe :)
DIY sliding perpetual Calendar. DIY wood calendar. DIY farmhouse decor. DIY calendar
 I cut each metal piece 5". So, two 5" piece for each label holder
DIY sliding perpetual Calendar. DIY wood calendar. DIY farmhouse decor. DIY calendar
 I cut the a portion of the brad off to make it shorter so it wouldn't poke out under the label holder.
DIY sliding perpetual Calendar. DIY wood calendar. DIY farmhouse decor. DIY calendar
 I then placed the brads into the each hole and spread them.

Next, I glued the metal pieces to the back of the label holder.
DIY sliding perpetual Calendar. DIY wood calendar. DIY farmhouse decor. DIY calendar
 That is for the first two label holders. The last one is a lot smaller, so I had to make some cuts to make it smaller. I roughly marked where I wanted to cut. I then used my Dremel to cut the middle parts out.
DIY sliding perpetual Calendar. DIY wood calendar. DIY farmhouse decor. DIY calendar
 I was left with the two end pieces.
DIY sliding perpetual Calendar. DIY wood calendar. DIY farmhouse decor. DIY calendar
 I used the super glue to join the two pieces. I then followed the same steps from above with the brads and the metal strips. Just make sure this is set before moving on to the next step.
DIY sliding perpetual Calendar. DIY wood calendar. DIY farmhouse decor. DIY calendar

Once the glue was set, I placed the label holder onto one of the wood pieces, and eyed where I wanted it to sit, I then bent the metal pieces over the wood, on the top side only.
DIY sliding perpetual Calendar. DIY wood calendar. DIY farmhouse decor. DIY calendar

DIY sliding perpetual Calendar. DIY wood calendar. DIY farmhouse decor. DIY calendar
 I did this to all the pieces.
DIY sliding perpetual Calendar. DIY wood calendar. DIY farmhouse decor. DIY calendar
 Next, I spray painted them with oil rubbed bronze. I didn't want to do this initially, but it help with the look of the smaller cut piece.
DIY sliding perpetual Calendar. DIY wood calendar. DIY farmhouse decor. DIY calendar
Step 5: Now cut out all the words and numbers with vinyl. Here are my rough measurements for each part:
Days of the week: 16" long total with about 3/4" between each day. These are 1/2" tall.
Months: 15.5" long with 3/8" between each month and 3/8" tall.
Numbers: 15.5" long with 1/4" between each number and  1/4" tall.

I used transfer tape for each line to save my sanity.

I marked the middle part of each horizontal wood piece, then placed a piece of tape 1/4" below it on each side. These made a good spot for me to place the bottom of the letters/numbers. If you notice, the words/numbers shouldn't fall right in the middle of the wood or else the label holders won't show them. The windows of the label holders aren't centered. So, to be sure you are placing the vinyl on the right spot, just test it. Place the transfer tape on the wood with the backing still on and put a label holder over it. Adjust if needed.
DIY sliding perpetual Calendar. DIY wood calendar. DIY farmhouse decor. DIY calendar
 I did do notches along the bottom of each word on the sides of each piece of vinyl. With this, I could easily see and line the bottom up with the tape.
DIY sliding perpetual Calendar. DIY wood calendar. DIY farmhouse decor. DIY calendar
 Here it is with all the lettering on: Oh, and make sure you don't put the lettering all the way to the sides, the label holder won't go the far. I tried to start mine in 2" from each side.
DIY sliding perpetual Calendar. DIY wood calendar. DIY farmhouse decor. DIY calendar
 Step 6: Next, I placed a screw on each side of the horizontal pieces, about 3/4" in on each side.
DIY sliding perpetual Calendar. DIY wood calendar. DIY farmhouse decor. DIY calendar
 Step 7: I then put the label holders back on, and bent them completely around.
DIY sliding perpetual Calendar. DIY wood calendar. DIY farmhouse decor. DIY calendar
And that's it! Lots of steps, but easy ones :)
DIY sliding perpetual Calendar. DIY wood calendar. DIY farmhouse decor. DIY calendar

DIY sliding perpetual Calendar. DIY wood calendar. DIY farmhouse decor. DIY calendar
 Here's a close up of the label holders, especially the smaller one. If you are super careful while cutting it, you won't hardly be able to tell. Spray painting helped :)
DIY sliding perpetual Calendar. DIY wood calendar. DIY farmhouse decor. DIY calendar
 My favorite part of this piece is oddly the sides. I love how this looks. The way each side/piece of wood took the stain is just beautiful to me.
DIY sliding perpetual Calendar. DIY wood calendar. DIY farmhouse decor. DIY calendar
 The total size of this sliding perpetual calendar is 21" long, 11.5" high, and 2.5" wide. I was going to make a bigger base for this, but kind of love the simplicity as is. It took everything I had in me not to paint this white though. I like it so much that I may just make another one and do it white; put it in my office...or the my future office :)
DIY sliding perpetual Calendar. DIY wood calendar. DIY farmhouse decor. DIY calendar
I got all my wood from the molding section in Lowes. They carry high quality smaller wood pieces like these. You can pick some up that are about 2 feet long. So, great for smaller projects.

This ended up costing me under $15. Not bad, since I've seen them going for over $40!
The below post contains affiliate links.

I was at Lowes the other day finding some wood for a different project and came across these cute wood bun feet. Can I just say that it's super weird to actually call them that :) I was toying around with the idea of what to do with them, and decided that if they were placed together they would make the perfect candlestick! So, next I went to Michaels for another project, and found these perfect circle plaques. I know I could have cut my own, but when they are on sale for 60 cents a piece, it's a no brainer.

This project is pretty simple to do and you can get a cute, large candlestick out of it for about $15!

Here's the supplies:
2 Wood Bun Feet
2 Wood circle plaques (about 5-6" in diameter and 1" thick)
Wood Glue
Drill
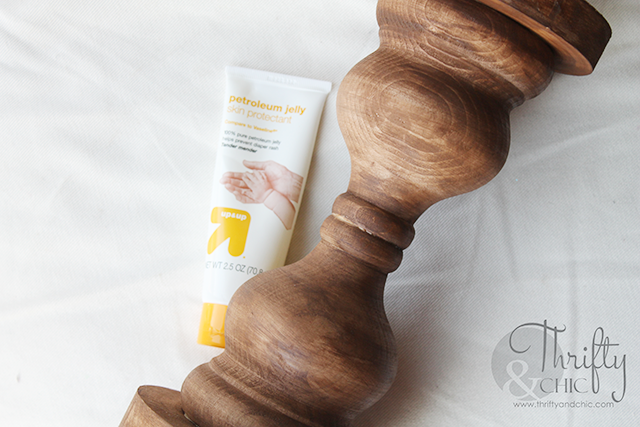
Finishing supplies (I used Walnut wood stain, petroleum jelly, white acrylic paint, sandpaper)
 DIY rustic wood candlesticks. DIY farmhouse candle holders. DIY farmhouse decor. Rustic decor. Diy wood candle sticks.

Step 1:  Since the feet have bolts in them, instead of spending the time trying to get them out or cut them down, I decided it would be perfect to screw them into the wood plaques instead. So, I found the center of each plaque and marked it.
 DIY rustic wood candlesticks. DIY farmhouse candle holders. DIY farmhouse decor. Rustic decor. Diy wood candle sticks.
 Step 2: I then found a drill bit about the same size as the bolts, and drilled a little over halfway through the plaques. I tested each hole with the bolt to see if it was deep enough, if it wasn't, I drilled just a tad bit further until it fit flush.
 DIY rustic wood candlesticks. DIY farmhouse candle holders. DIY farmhouse decor. Rustic decor. Diy wood candle sticks.
 Step 3: I then glued all the pieces together. I placed glue in the holes and around the bottom side of each plaque. I also placed glue in the middle of the bun feet. Once everything was glued, I sat it on the counter and put a couple of books on top to weigh it down until the glue had time to adhere properly.
 DIY rustic wood candlesticks. DIY farmhouse candle holders. DIY farmhouse decor. Rustic decor. Diy wood candle sticks.
 This is what it looked like all put together.
 DIY rustic wood candlesticks. DIY farmhouse candle holders. DIY farmhouse decor. Rustic decor. Diy wood candle sticks.
 Step 4: Finish it. First, I applied walnut wood stain to the entire piece. I actually loved it this color, and kept it that way a for a few days. But, my curiosity got the best of me and I wanted to see it painted and distressed.  So, I added some petroleum jelly to strategically random areas of it.
 DIY rustic wood candlesticks. DIY farmhouse candle holders. DIY farmhouse decor. Rustic decor. Diy wood candle sticks.
 I then painted it with white acrylic paint. This took about 3 coats for full coverage.
 DIY rustic wood candlesticks. DIY farmhouse candle holders. DIY farmhouse decor. Rustic decor. Diy wood candle sticks.
 After it was completely dried, I took some sandpaper and started sanding. The places that come up easily is where the petroleum jelly was placed. I sanded until I was happy with the amount of distressing.

The white fits my decor beautifully...along with all my other candlesticks.
 DIY rustic wood candlesticks. DIY farmhouse candle holders. DIY farmhouse decor. Rustic decor. Diy wood candle sticks.
 Here it is in brown. I seriously love this brown. I'll be going back to get all the supplies to make a few more of these so I can keep a couple in brown :)
 DIY rustic wood candlesticks. DIY farmhouse candle holders. DIY farmhouse decor. Rustic decor. Diy wood candle sticks.
 You would never have thought this came from two bun feet! It adds the perfect farmhouse decor element to any vignette.
 DIY rustic wood candlesticks. DIY farmhouse candle holders. DIY farmhouse decor. Rustic decor. Diy wood candle sticks.
 I can't wait to play around with these more throughout the house. Either using them by themselves as cute little plant stands. Or....possibly, as they are intended, with actual candles on them :) lol
 DIY rustic wood candlesticks. DIY farmhouse candle holders. DIY farmhouse decor. Rustic decor. Diy wood candle sticks.
I just love wasting time at hardware stores finding stuff that could become something else!

Which one is your fave? The brown or the white? I can't decide!

Interested in this project? By similar bun feet below from Amazon!


Pin for later! DIY Wood Candlesticks
DIY rustic wood candlesticks. DIY farmhouse candle holders. DIY farmhouse decor. Rustic decor. Diy wood candle sticks from chair spindles or feet

Disclosure of Material Connection: Some of the links in the post above are “affiliate links.” This means if you click on the link and purchase the item, I will receive an affiliate commission. Regardless, I only recommend products or services I use personally and believe will add value to my readers. I am disclosing this in accordance with the Federal Trade Commission’s 16 CFR, Part 255: “Guides Concerning the Use of Endorsements and Testimonials in Advertising.”