I was provided product by DecoArt and compensated to write about this project, but all thoughts, opinions, and ideas are my own :)
When you do as many DIY projects as me, you get a lot of scrap wood pieces. And if you are also like me, you can't ever seem to throw those pieces away. You never know when that 5 inch piece of molding or wood is going to come to good use, right? Ha! Serious though, my scrap pile is so big it's a little ridiculous. Every once in awhile I try to go through it and use it up, and I actually do pull pieces from it often to use on other projects. Today, I'm going to share with you a cute little spring wreath using nothing but scrap would pieces from my pile.
I love how this turned out so much that I'll probably be doing another one which I'll update this post with to give you all more ideas.
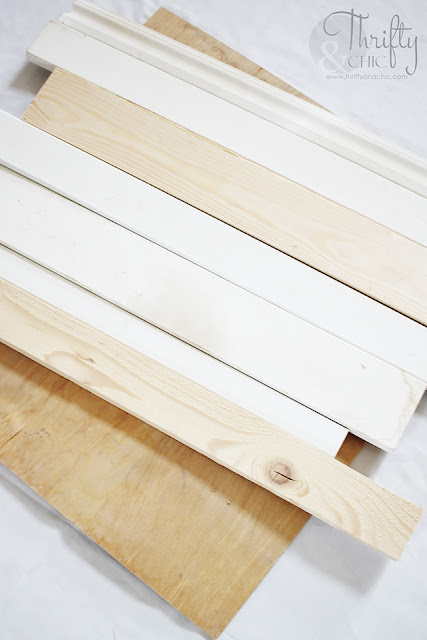
So, here are my scrap would pieces. I used quite a mixture or wood or mdf in all different sizes. The backing that I used was also a scrap piece from one of my furniture builds, it's 1/16" piece of plywood. If you don't have this available, you can buy it at a building supply store for about $5 for a 4'x4' piece.
The width of all the wood pieces together was about 19". That was around the size I wanted for my wreath, so I made sure that all the pieces were at least that length also.
I painted the wood and mdf using DecoArt's Americana Acrylic Paint in Royal Navy, Berry Cobble, and Vintage Pink. I originally had left the middle mdf piece white, but then decided to use Snow White in the acrylic paint on it also. This took about two coats for full coverage.
Next, I used the wood glue and squirted it all over the plywood.
I then added the wood and mdf on top of the plywood, securing them down with weights. I kept these like this for a couple of hours to make sure the wood glue adhered properly.
Next, I used a piece of string and a pen to outline the outer circle. I did this by tying a knot in the middle of the string and securing it in the very center of the pieces with a thumbtack. I then stood the pen up and stretched the string out as far as it could go, and made a circle. To get the length of the string initially, I just pulled it out to the shortest edge. It ended up being about 9".
I then took a bowl (an easier method) to trace the inner circle. Since I wanted to make this circle off centered, I just eyed where I wanted it. If you want it centered, you would want to measure to make sure it was equidistant from all edges of the previous circle.
To make the jigsawing process easier, I drilled a hole into the middle circle that's big enough to fit the jigsaw blade.
Now the fun part :) I put on my protective gear, and use the jigsaw to cut out the outer circle.
Next, I cut out the center circle starting in the hole that was drilled earlier.
I sanded all the edges.
Then painted the edges using the Snow White.
I added tied jute onto the back for it to hang. I secured the knots with a staple gun.
To finish it off, I hot glued flowers onto the bottom left along with a "hello" chipboard sign onto the top right that I had used last spring on a different wreath.
The "hello" was painted using DecoArt Americana Decor Matte Metallics in Aged Bronze.
And there's the finished piece!
It has found it's place on my mantel for now, but it will be heading to my door when the weather gets a little bit better.
I just love being able to make things like this at little to no cost; it's the best!
To find more spring decor ideas, be sure to check out DecoArt and their social media for more inspiration!
www.decoart.com
Pin for later:
Disclosure of Material Connection: This is a “sponsored post.” The company who sponsored it compensated me via a cash payment, gift, or something else of value to write it. Regardless, I only recommend products or services I use personally and believe will be good for my readers. I am disclosing this in accordance with the Federal Trade Commission’s 16 CFR, Part 255: “Guides Concerning the Use of Endorsements and Testimonials in Advertising.”


0 comments:
Yorum Gönder