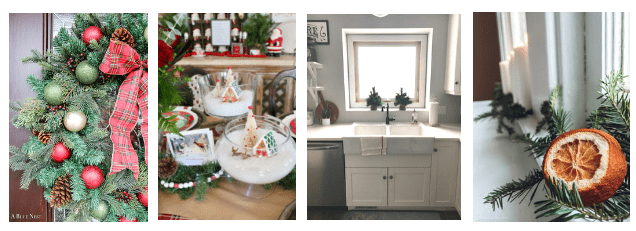
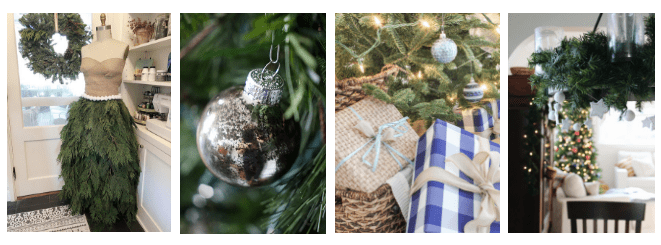
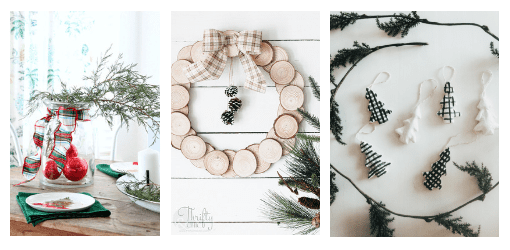
I know its two weeks into January, but I wanted to get this out before it got even later :) I had a lot going these past few weeks, and now I finally have time! If you follow me on social media, you'll know that I had an awesome opportunity come up! I had a photo shoot for American Farmhouse Style Magazine where they shot all my Christmas decor this year for next year's (well technically this year's now) magazine. I am so honored to be chosen for this! It was a little nerve wracking though trying to get my house ready for it. It's a little different taking pictures for my blog knowing the screen is only so big, and that the camera hides a lot of stuff. But, having my rooms blown up to magazine size....now that's a different thing. I really had no clue how dusty and dirty my house had gotten over the years. I had to touch up paint like no other, dust places I didn't even know grew dust...yes grew :) haha. There was a lot of prep, but it was totally worth it and I can't wait for the issue to come out! ....to bad I have to wait like a whole year! I'll be sure to share with you guys when it's out on news stands so you can check it out too :)

Now for my top posts! I love looking back at these every year, first because it's fun to remind myself I actually did accomplish something and second to see what you all like seeing :) Here it goes! Click on the titles or the pictures and they will take you to the post. 

#1: DIY CATHEDRAL WINDOW FRAME FOR LESS THAN $5
Best DIY projects for your home. Top decorating project tutorials. Top 10 projects. Most popular decorating projects and diy tutorials

#2: SPRING HOME TOUR
Best DIY projects for your home. Top decorating project tutorials. Top 10 projects. Most popular decorating projects and diy tutorials

#3 DIY SPRING HULA HOOP WREATH
Best DIY projects for your home. Top decorating project tutorials. Top 10 projects. Most popular decorating projects and diy tutorials

 #4: DIY SHIPLAP FAUX FARMHOUSE CLOCK
Best DIY projects for your home. Top decorating project tutorials. Top 10 projects. Most popular decorating projects and diy tutorials

#5 SUMMER HOME TOUR
Best DIY projects for your home. Top decorating project tutorials. Top 10 projects. Most popular decorating projects and diy tutorials

#6 DIY SPRING EUCALYPTUS WREATH
Best DIY projects for your home. Top decorating project tutorials. Top 10 projects. Most popular decorating projects and diy tutorials

#7 UNICORN BIRTHDAY PARTY IDEAS AND DIY UNICORN CAKE
Best DIY projects for your home. Top decorating project tutorials. Top 10 projects. Most popular decorating projects and diy tutorials

#8 THE BEST DIY FARMHOUSE DECOR PROJECTS AND TUTORIALS

#9 DIY FARMHOUSE STYLE WOOD CORBEL
Best DIY projects for your home. Top decorating project tutorials. Top 10 projects. Most popular decorating projects and diy tutorials

#10 BOARD AND BATTEN KITCHEN ISLAND MAKEOVER
Best DIY projects for your home. Top decorating project tutorials. Top 10 projects. Most popular decorating projects and diy tutorials


I was provided product by DecoArt and compensated to write about this project, but all thoughts, opinions, and ideas are my own :)

Happy New Year! This past year has come and gone all to quickly. Do you remember when the days seemed to take forever to go by when you were younger? And, well, now, I feel like summer was just two weeks ago. Obviously, telling by the -5 degree temps we are currently experiencing that's not the case :) I decided to live this year by being more in the moment. I love looking forward to things, but I feel like that makes you wish the current moment away or not enjoy it in it's entirety. When you have little ones in the house, you want to live as much in the moment as possible and soak in every little bit. 

That being said....on to today's project! Have you seen the beautiful cement tiles recently that are all the rage? Whenever I get a chance to rip up my tile in my bathrooms, that tile is for sure going on. But, until then, I decided to get the look going in my new hutch with these beautiful stencils and paint from DecoArt.
DIY Stenciled tile tutorial. How to stencil tile. DIY cement tile stenciling. Canvas stenciled tile decor. Hutch decor and decorating ideas

Supplies I used for this project:
3 Canvases (two 8x8, one 6x6)
DecoArt Americana Decor Stencils in Mediterranean Tile and Scandinavian Stitch

DIY Stenciled tile tutorial. How to stencil tile. DIY cement tile stenciling. Canvas stenciled tile decor. Hutch decor and decorating ideas
 DecoArt Americana Decor Acrylic Paint in Thicket, Light Sage, Sand Grey, and Morning Mist.

DIY Stenciled tile tutorial. How to stencil tile. DIY cement tile stenciling. Canvas stenciled tile decor. Hutch decor and decorating ideas
Spray Adhesive
Stenciling brush(es)
1/2x2" molding pieces (for 8x8 canvas -2 @ 8" and 2 @9". For 6x6 canvas -2 @6" and 2 @7")
Hot Glue

My first step was to get all my paints and decide what colors I wanted to use. I knew I wanted 3 for the 8x8 canvases and the Mediterranean Tile stencil. Next was deciding on a coordinating color for the smaller canvas and Scandinavian Stitch stencil. I found a good way to do this was getting all the colors I had in mind out on a single piece of paper. 

DIY Stenciled tile tutorial. How to stencil tile. DIY cement tile stenciling. Canvas stenciled tile decor. Hutch decor and decorating ideas
 Step 1: Lightly spray the adhesive onto the back of the stencil and then place it onto the canvas as evenly as possible. Press down on the stencil so it adheres to the canvas. Some areas may not adhere as well, so you'll just have to hold those areas down while stenciling.
DIY Stenciled tile tutorial. How to stencil tile. DIY cement tile stenciling. Canvas stenciled tile decor. Hutch decor and decorating ideas
 Step 2: On the first tile, I started with Sand Grey in the middle design. That design also carries through onto the corners. I used a stippling brush and the dry brush technique to achieve this look. That means, just dip your brush into the paint, then tap it a few times on a scrap piece of paper to get excess paint off of it. Then you are good to go. 
DIY Stenciled tile tutorial. How to stencil tile. DIY cement tile stenciling. Canvas stenciled tile decor. Hutch decor and decorating ideas
 Step 3: I then used the Light Sage on the more floral sections of the stencil using the same dry brush technique. 
DIY Stenciled tile tutorial. How to stencil tile. DIY cement tile stenciling. Canvas stenciled tile decor. Hutch decor and decorating ideas
 Step 4: The last color was Thicket along the remaining pieces. 
DIY Stenciled tile tutorial. How to stencil tile. DIY cement tile stenciling. Canvas stenciled tile decor. Hutch decor and decorating ideas
 Here's the finished look using this color combination.
DIY Stenciled tile tutorial. How to stencil tile. DIY cement tile stenciling. Canvas stenciled tile decor. Hutch decor and decorating ideas
 I wanted to use the same stencil and same colors, but didn't want them to match. So, I switched up the color placements. You can see that the stronger color takes the focus and creates a totally different look and feel even though the colors and stencil are the same.
DIY Stenciled tile tutorial. How to stencil tile. DIY cement tile stenciling. Canvas stenciled tile decor. Hutch decor and decorating ideas
 On the Scandinavian Stitch stencil and 6x6 canvas, I used Morning Mist as the main color and then tied in the Sand Grey on the squares.
DIY Stenciled tile tutorial. How to stencil tile. DIY cement tile stenciling. Canvas stenciled tile decor. Hutch decor and decorating ideas
 Step 5: To finish this off, I cut the 2" molding pieces to spec (as mentioned in the supplies above).
DIY Stenciled tile tutorial. How to stencil tile. DIY cement tile stenciling. Canvas stenciled tile decor. Hutch decor and decorating ideas
 Step 6: I painted the molding that was going onto the 8x8 canvases with Thicket. I made sure to paint all sides. I painted the 6x6 molding with Sand Grey.
DIY Stenciled tile tutorial. How to stencil tile. DIY cement tile stenciling. Canvas stenciled tile decor. Hutch decor and decorating ideas
 Step 7: I then used my hot glue gun to adhere the molding. I placed the smaller pieces onto the canvas first leaving about a 1/2" space on the inside. I then secured the longer pieces making sure they overlapped the shorter molding equally. 
DIY Stenciled tile tutorial. How to stencil tile. DIY cement tile stenciling. Canvas stenciled tile decor. Hutch decor and decorating ideas

DIY Stenciled tile tutorial. How to stencil tile. DIY cement tile stenciling. Canvas stenciled tile decor. Hutch decor and decorating ideas
 And done! I don't add color into my house often, but when I do, it's usually in this corner of my kitchen and for some reason, in this color :) I just love how it pops against neutrals and browns. 
DIY Stenciled tile tutorial. How to stencil tile. DIY cement tile stenciling. Canvas stenciled tile decor. Hutch decor and decorating ideas
 You can see from this angle the difference in the 8x8 canvases. They look like completely different stencils. It's just all about where you place the dominant color :)
DIY Stenciled tile tutorial. How to stencil tile. DIY cement tile stenciling. Canvas stenciled tile decor. Hutch decor and decorating ideas

DIY Stenciled tile tutorial. How to stencil tile. DIY cement tile stenciling. Canvas stenciled tile decor

DIY Stenciled tile tutorial. How to stencil tile. DIY cement tile stenciling. Canvas stenciled tile decor. Hutch decor and decorating ideas

I actually love this Mediterranean Tile stencil so much, I used it on the playhouse floor. You can see more about this space here:
DIY Stenciled tile tutorial. How to stencil tile. DIY cement tile stenciling.

DIY Stenciled tile tutorial. How to stencil tile. DIY cement tile stenciling.
And I'll probably be using it lots of other places too :) 

Be sure to check out DecoArt and their social media for more inspiration!
www.decoart.com
Facebook
Instagram
Pinterest 


Disclosure of Material Connection: This is a “sponsored post.” The company who sponsored it compensated me via a cash payment, gift, or something else of value to write it. Regardless, I only recommend products or services I use personally and believe will be good for my readers. I am disclosing this in accordance with the Federal Trade Commission’s 16 CFR, Part 255: “Guides Concerning the Use of Endorsements and Testimonials in Advertising.”

When you have a playhouse and your promise your kids that you will decorate it, you do it....even if it's snowy and gloomy :) I had plans to decorate this for Christmas since I built it, but the pink on it total threw me off. As you know, I'm not one for much color. It took all it had in me to not paint the pink black. But, this wasn't for me :) So, I embraced the pink and decided to make a wintery candy land! 

Candy Land Christmas Decor and decorating ideas. Playhouse Christmas decor. How to decorate a kids space for Christmas.
 As you can tell by the pictures, it's been pretty gloomy outside. :) 

I never knew in my wildest dreams I would ever buy a white tree. I know, I know. I love white and decorate with nothing else...but, a white tree was a little faux pas for me. I went a search for a pink tree but couldn't find one, so I decided to embrace the white. 

I brought in the pink from the door into the decorations with this Merry and Bright sign along with some tassels hanging on the lantern. 
Candy Land Christmas Decor and decorating ideas. Playhouse Christmas decor. How to decorate a kids space for Christmas.

Since I had a white tree, I wanted to bring in some pinks and inevitably large lollipops were added...because why not? :)
Candy Land Christmas Decor and decorating ideas. Playhouse Christmas decor. How to decorate a kids space for Christmas.
 I hung some pompom garland along the roof to add a little more whimsy. 
Candy Land Christmas Decor and decorating ideas. Playhouse Christmas decor. How to decorate a kids space for Christmas.
 Most of these decorations are from Hobby Lobby. The tree was from Walmart. The green garland from Michaels. 
Candy Land Christmas Decor and decorating ideas. Playhouse Christmas decor. How to decorate a kids space for Christmas.

Now I can't wait for it to snow and see how this all looks! Hope you all have a Merry Christmas!


I can't believe how close Christmas is! I'm trying my best to soak in all the Christmas spirit I can, but I have become overwhelming busy the past few weeks that it's so hard to do! So busy that I never did get around to sharing my Christmas entryway and a first, my Christmas bathroom! I have also decorated the playhouse into a wintery candy land which I will probably share with you next week. 

Up first is my entryway. 
Farmhouse Christmas decor and decorating ideas. Christmas entry way decor. Board and batten entry way. Bathroom Christmas decor. Fresh greenery ideas. Farmhouse bathroom decor and ideas.
 I traded out my normal Christmas wreath for a large printed sign with some garland sagged over it. I actually had quite the hard time figuring out this space this year, that's why it's so late to be shared :) I was trying hard to add reds and greys and it just wasn't feeling right. After days of moving things around, I finally told myself, go back to what you know. Neutrals! And like a gem, it was perfect the first time. :)
Farmhouse Christmas decor and decorating ideas. Christmas entry way decor. Board and batten entry way. Bathroom Christmas decor. Fresh greenery ideas. Farmhouse bathroom decor and ideas.

I'm excited to share more of this space with you in the coming weeks, but here's a sneak peak of a view I've never really have shown. The board and batten up the wall is all new! It has made the biggest difference to my entryway. As for the garland, I just love my railing so much and hate the carpet on my stairs, so the garland usually finds itself on the bottom...showing off the railing and covering up the carpet :) 
Farmhouse Christmas decor and decorating ideas. Christmas entry way decor. Board and batten entry way. Bathroom Christmas decor. Fresh greenery ideas. Farmhouse bathroom decor and ideas.
 Here's the other view going towards the door. I found this awesome bucket at Hobby Lobby for the tree. It reminded me a little bit of a trash can, but once the tree was in there I didn't care. 
Farmhouse Christmas decor and decorating ideas. Christmas entry way decor. Board and batten entry way. Bathroom Christmas decor. Fresh greenery ideas. Farmhouse bathroom decor and ideas.


Now for my bathroom. This is the room I chose to do fresh greenery in and oh am I ever so glad I did. Having fresh greens in a somewhat enclosed space makes for a beautiful aroma. I changed around my shelves to fit the small Christmas tree and greens. I also add this 2 second bath caddy board. Seriously took 2 seconds to make. Went into my garage, remembered I had a piece of already stained wood, hoped it would fit, took it into the bathroom, placed it on the tub. It fit. Boom and done :) 
Farmhouse Christmas decor and decorating ideas. Bathroom Christmas decor. Fresh greenery ideas. Farmhouse bathroom decor and ideas.

This side of my bath I don't share regularly either, but it has a small change that I will once again share with you in the coming weeks. Oh, and this orb chandelier is new! It was the perfect addition :) Most of my fresh greens in this room are tree clippings from a local Christmas tree seller. Got them for free! It's like the best...cheapest, Christmas decor ever. 
Farmhouse Christmas decor and decorating ideas. Bathroom Christmas decor. Fresh greenery ideas. Farmhouse bathroom decor and ideas.

Can't wait to share the playhouse with you next! But, until then. I'll be here doing some yoga, trying to relax, listening to some Christmas music, drinking hot chocolate, tangling myself up in lights...you know the drill :) Everything I can to feel that magic of Christmas before it is gone!
This post contains affiliate links.

Christmas season is in full swing around here. I have a list of projects a mile long. I'm sure I'll get to some, but some just don't matter :) It's like one of those things, you get your list so long and feel like you can't do it and stress over all of it. Well, I'm just letting go this Christmas and keeping things pretty simple. This wood slice wreath is one of those crafts that I knew I wanted to do and wouldn't take a long time doing it. I'm excited to share this tutorial with the Christmas I DIYed That blog hop hosted by Jen from Noting Grace. These ladies are sharing some wonderful Christmas inspiration. Be sure to check them all out (links below). 
DIY 5 minute wood slice wreath tutorial. How to make a wood disc wreath. DIY easy Christmas crafts. DIY Christmas ideas. Farmhouse Christmas decor. Woodland Christmas wreath.


This wreath serious took about 5 minutes to make. You just need a few things to make it:
Wood discs (about 3-4" in diameter. I bought my here)
Large bowl or plate
Hot glue
Ribbon or bow
Jute
Pine cones.

I used 13 pieces as the bottom layer and 13 for the top.
DIY 5 minute wood slice wreath tutorial. How to make a wood disc wreath. DIY easy Christmas crafts. DIY Christmas ideas. Farmhouse Christmas decor. Woodland Christmas wreath.
My bowl is about 10" in diameter. I picked the largest discs and placed them around the bowl.
DIY 5 minute wood slice wreath tutorial. How to make a wood disc wreath. DIY easy Christmas crafts. DIY Christmas ideas. Farmhouse Christmas decor. Woodland Christmas wreath.
Once I had them all in place and lined up how I wanted, I moved the bowl.
DIY 5 minute wood slice wreath tutorial. How to make a wood disc wreath. DIY easy Christmas crafts. DIY Christmas ideas. Farmhouse Christmas decor. Woodland Christmas wreath.
Then with each of the smaller discs, I placed some hot glue on the back and put it right on top of where two bottom discs touch. 
DIY 5 minute wood slice wreath tutorial. How to make a wood disc wreath. DIY easy Christmas crafts. DIY Christmas ideas. Farmhouse Christmas decor. Woodland Christmas wreath.
I did this same process around the whole wreath. 
DIY 5 minute wood slice wreath tutorial. How to make a wood disc wreath. DIY easy Christmas crafts. DIY Christmas ideas. Farmhouse Christmas decor. Woodland Christmas wreath.
Now that the wreath is made, it's time to add the accessories. First up is the bow. I decided to make my own bow out of ribbon I found at Hobby Lobby. I cut a 14" piece, then looped it, securing the ends with hot glue.
DIY 5 minute wood slice wreath tutorial. How to make a wood disc wreath. DIY easy Christmas crafts. DIY Christmas ideas. Farmhouse Christmas decor. Woodland Christmas wreath.
Next I cut another 14" piece, placed the middle on the back of the looped piece. I then cut about a 4" piece, folded it in half, and looped it around both those pieces securing it in place on both ends with hot glue.
DIY 5 minute wood slice wreath tutorial. How to make a wood disc wreath. DIY easy Christmas crafts. DIY Christmas ideas. Farmhouse Christmas decor. Woodland Christmas wreath.
I fluffed it out, and hot glued it onto one of the discs.
DIY 5 minute wood slice wreath tutorial. How to make a wood disc wreath. DIY easy Christmas crafts. DIY Christmas ideas. Farmhouse Christmas decor. Woodland Christmas wreath.
Next, I cut 3 pieces of jute at varying lengths.I glued the ends of each one onto the top of a pine cone. I tied the ends of the jute all together.
DIY 5 minute wood slice wreath tutorial. How to make a wood disc wreath. DIY easy Christmas crafts. DIY Christmas ideas. Farmhouse Christmas decor. Woodland Christmas wreath.
I glued the knot of the jute onto the disc behind the bow. I also did a lazy man's route of creating a thing to hang the wreath by hot gluing a two inch piece of jute on both ends to the discs. I can't guarantee this will hold it :)
DIY 5 minute wood slice wreath tutorial. How to make a wood disc wreath. DIY easy Christmas crafts. DIY Christmas ideas. Farmhouse Christmas decor. Woodland Christmas wreath.
I love how simple this wreath is, both in looks and how easy it is to make. Just lots of hot glue! 
DIY 5 minute wood slice wreath tutorial. How to make a wood disc wreath. DIY easy Christmas crafts. DIY Christmas ideas. Farmhouse Christmas decor. Woodland Christmas wreath.
It's been fun playing around with a home for this. I think I have settled on having it in my front room. What do you think? 
DIY 5 minute wood slice wreath tutorial. How to make a wood disc wreath. DIY easy Christmas crafts. DIY Christmas ideas. Farmhouse Christmas decor. Woodland Christmas wreath.
I think it goes with the theme in here pretty well. 
DIY 5 minute wood slice wreath tutorial. How to make a wood disc wreath. DIY easy Christmas crafts. DIY Christmas ideas. Farmhouse Christmas decor. Woodland Christmas wreath.

For lots more Christmas inspiration, check out all these talented ladies below! 

2018 Christmas I DIYed That Home Tour


Pin for later!
DIY 5 minute wood slice wreath tutorial. How to make a wood disc wreath. DIY easy Christmas crafts. DIY Christmas ideas. Farmhouse Christmas decor. Woodland Christmas wreath.


Disclosure of Material Connection: Some of the links in the post above are “affiliate links.” This means if you click on the link and purchase the item, I will receive an affiliate commission. Regardless, I only recommend products or services I use personally and believe will add value to my readers. I am disclosing this in accordance with the Federal Trade Commission’s 16 CFR, Part 255: “Guides Concerning the Use of Endorsements and Testimonials in Advertising.”